
Caramelized, chocolate covered nuts are fabulously tasty and easy to master once you conquer your fear of burning sugar. Let’s do this!
Eager to get cooking? Skip To Recipe.
There is no better time to reflect on fear and failure than in the wake of a success, or so I’m telling myself as the glow of my biggest career break so far begins to fade into the what-have-you-done-lately distance. Truth is, I was wrestling with fear for the duration of my frenzied five-day turnaround for Texas Monthly, proof that even when things go right, the brain can be convinced otherwise. “We are all running in fear!” said my mother as she listened to me verbally wring my hands during a quick break from banging my keyboard.
She’s right, of course. Fear is the great and terrible motivator, the universal ingredient in every anxious mind and constricting chest. A dash of fear can move us forward, but up-end the jar and everything is tainted by it, the flavor of paralysis and panic. It’s a balancing act, one I’m just now learning to navigate without the booze and theatrics of my youth (and thank the gods for phrases like, “of my youth,” the literary equivalent of filing one’s idiocies in the cabinet of regrets and slamming the drawer firmly shut). I’m still me, after all, and no amount of filing and forgetting can eradicate my countless failings.
That is one of the kajillion reasons I always return to cooking, and why I’ve chosen to write about it for a living. There is so much fear to tangle with in the kitchen. Fear of failure, fear of rejection, fear of wasting precious ingredients—FEAR! And despite my years working in kitchens and with chocolate no less, one of the fiddliest and most failure-prone mediums you can eat, I am still intimidated by complex recipes, tricky techniques, and don’t get me started on the perils of baking. FEAR! (Check out Daniel Hernandez’s recent thoughts on how, “failure is one of the defining features of food culture.”)
But a kind of magic happens when I pour my efforts into something tangible and edible. Confidence seeps into my wobbly subconscious and, for a few brief moments, I am able to focus on something achievable, however imperfect the final result.
My childhood friend, one of my nearest and dearest, sent me a response to my last blog that stuck with me. This friend, we’ll call her Poopy (an old nickname I gave her in fourth grade, god knows why), is not a cook. She’s an insanely talented writer and makes one of my all-time favorite lasagnas out of jarred sauce and sharp white cheddar, but she doesn’t spend her days pouring over recipes and dreaming up meals, as I do. (I’ll never forget when her husband, also a dear childhood friend, also not a cook, called me in the middle of my workday feeding shortbread into a chocolate enrobing machine to ask me how to hard-boil an egg.)
Poopy described herself as, “a cooking novice and pleeb…completely at sea,” when it comes to matters of the kitchen, but felt that my blog, “makes it all okay again, an adventure as opposed to anything scary.” I still get verklempt thinking about it. Obviously, she’s my friend and therefore contractually bound to support my work. But the idea that I might allay the fears of others, even in the context of something as trivial as putting food on the table, comforts and catches me off guard. Because we’re in this together, particularly when one or all of us is hungry. Because, as Ruth Reichl reminded me in a recent newsletter, “food is more than something to eat.” And because adventure, by its very definition, involves an element of risk.
This isn’t to say that conquering fear is all down to mental acrobatics or cooking something tasty. I deeply resent those insidious wellness gurus who push the notion that we can mentally lift ourselves out of a depressive morass if only we think good thoughts. That sounds suspiciously like psychological bootstrapping to me, and I think we’re all becoming aware of how specious bootstrapping is for folks who don’t have boots to strap. We all carry fears that we can’t obliterate by sheer force of will. One of my very real fears about attempting to write professionally at 42—with zero savings—is that I won’t be able to pay my bills or put food on my table. No amount of positive thinking can wish that reality away. But if I step away from my laptop and cook something, I really do feel better. I don’t have to think myself out of despair, I just make dinner and move on. It ain’t therapy, but it sure is therapeutic.
This month’s recipe for dragée peanuts (pronounced drah-jay, it’s French) smacks of fear because it involves burning sugar, and that’s always scary (I once boiled over a massive 24-gallon copper kettle of burnt caramel sauce mere hours before my performance review and was lucky to escape without third degree burns—terrifying!). It also involves chocolate which can be extremely fraught for the home cook, particularly if tempering is involved. (Tempering is the process in which chocolate is warmed, cooled, and agitated in order to encourage the crystals of cocoa butter to form in such a way that when the chocolate solidifies it is snappy, shiny, and smoothly melty—notoriously tricky to nail.)
But wait! Don’t run away just yet. My method for burning sugar (aka, making a dark caramel) is pretty dang user-friendly, and we’re only going to half-temper the chocolate so that it cools quickly, clings better to the nuts, and offers up a soft, silky coating. It’s actually a good way to get the feel of tempering without the pressure of making a filled, molded chocolate that then refuses to release from the mold or turns splotchy white and crumbly a day later—heartbreak. We’ll save that for later in the year when we’re all feeling more confident or fool-hardy. (If there’s a recipe you want to explore with me, send me a message and let me know!)
So, let’s make some candied, chocolate-covered nuts, and let’s do it together. Barring third degree burns, this recipe is hard to mess up, and the combination of sugar, chocolate, nuts, and salt (never forget the salt!) is hard to beat. The ingredients are humble, the result is delicious, and once you live through your first sugar burning, you’ll feel like a culinary god. If that confidence helps quiet those other fears for just an hour or two, then huzzah! One foot in front of the other, on we go.
Dragée Peanuts (caramelized chocolate covered nuts)
Yields 1 3/4 lb. finished nuts (or about 4 cups)
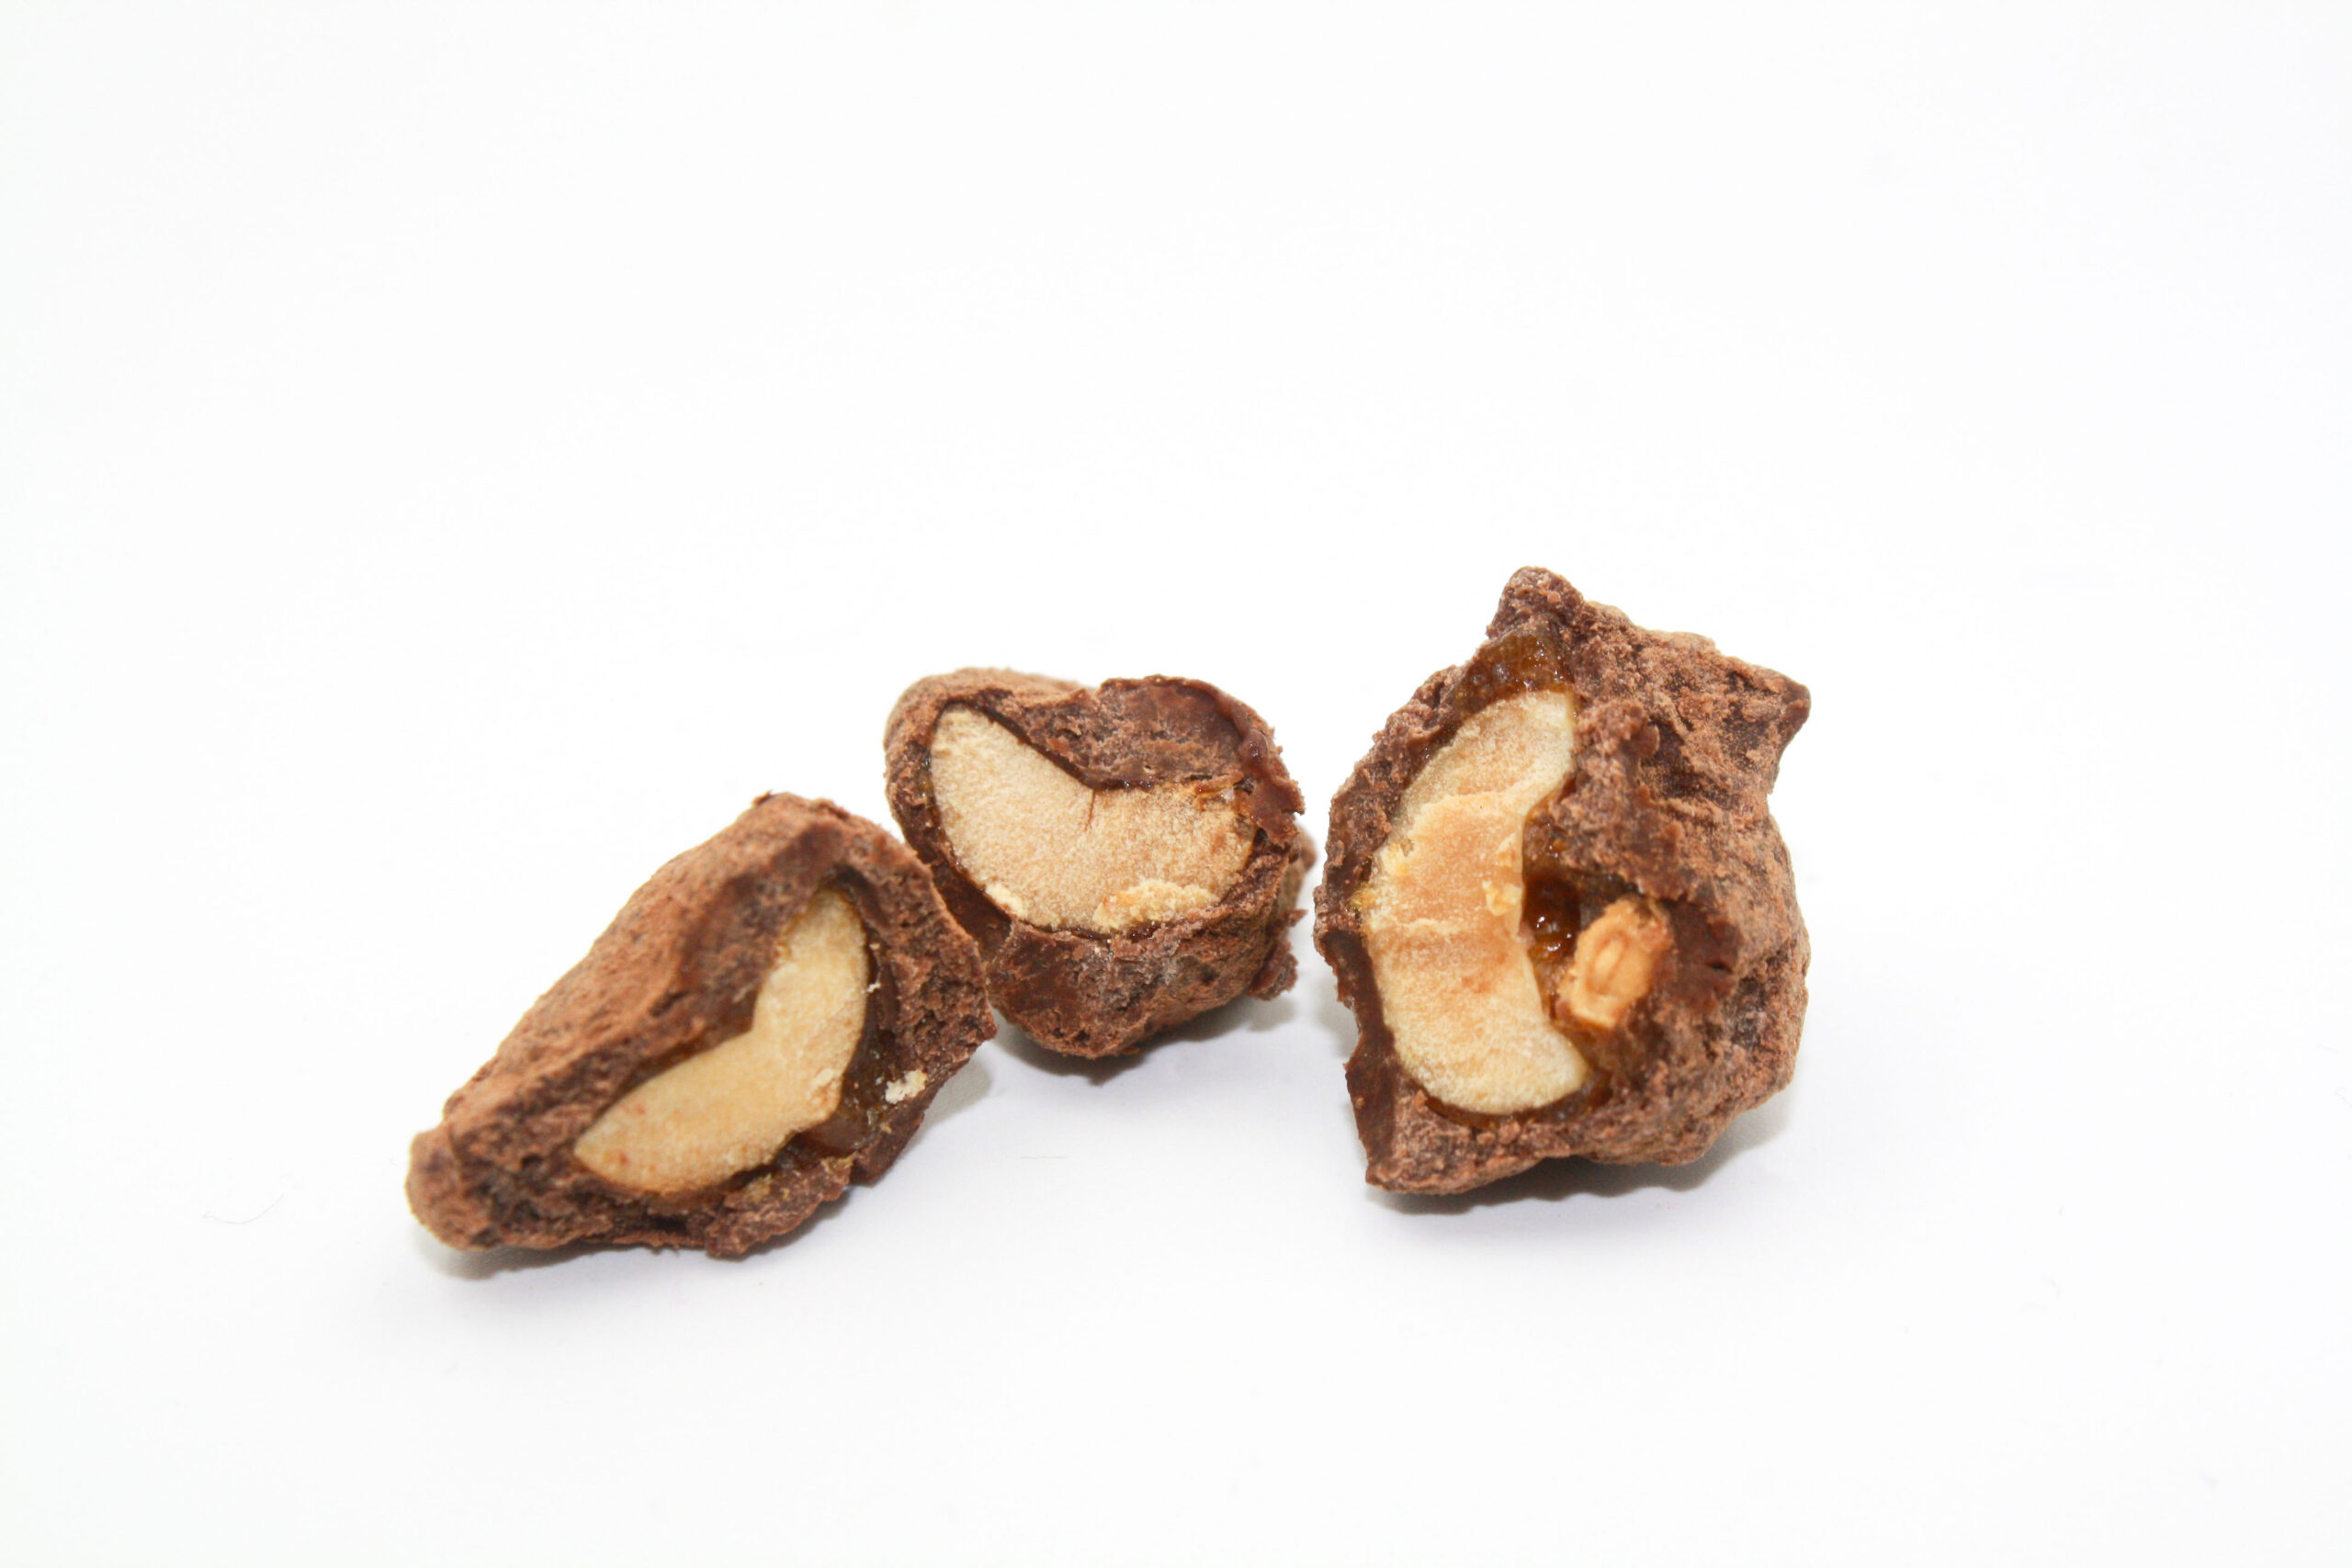
Dragée nuts are caramelized or candied nuts coated in chocolate, and they are addictive and delicious. Of all the recipes I picked up during my 12+ years as a chocolatière and confectioner, this is my favorite to make at home. There is a traditional way to make them that involves caramelizing the nuts in a sugar syrup, and we’re not going to do that. It’s fiddly, hard to scale, and requires a candy thermometer. There is an easier way!
We’re going to use my preferred method which involves the loosey-goosey sprinkling of granulated sugar over freshly toasted nuts in modest increments until the nut is fully coated in a dark amber sugar shell. The goal with this method is to add just enough sugar to create a fairly even coating of caramel on the nuts, without adding so much that the nuts get soupy (they’re hard to separate into individual nuts if they’re swimming in puddles of caramel).
This recipe calls for peanuts and a mixture of milk and dark chocolates, but you can experiment with almost any nut and certainly any combination of chocolates (also spices, see my tips section at the bottom of the recipe). I recommend you read through the following quick tips before starting, because once this recipe is underway, there’ll be no time to shilly-shally.
- Get all your ingredients and workspaces ready before you begin. You’ll have very little time to fiddle with your setup once you start.
- Don’t use nuts with skins, as the skins will burn long before your nuts are caramelized. You can usually find blanched almonds at the store, and raw whole peanuts are usually skinless. Or, you can blanch the skins off yourself (an extra step, but totally doable).
- While nuts like almonds will tend to hold their shape during caramelization, peanuts, cashews, and hazelnuts tend to fall apart. That’s OK! The finished product will feature more clumps than individual nuts and, believe me, no one will complain about the resulting crunchetty-caramelly-chocolatey clusters.
- Clear off a table or cool surface (not wood) near your caramelizing station for when you’re ready to cool the nuts. You want to dump those nuts quickly when they’re ready, as the caramel continues to cook after you remove it from the heat, and you don’t want to be walking through your house with pot of molten caramel. You can also line up a couple of sheet pans on a nearby tabletop.
- BE CAREFUL! Working with hot sugar is dangerous and can result in serious burns. Keep your potholders and a damp rag for wiping your hands nearby, and don’t touch the caramel until you are ready to separate the nuts. And—fair warning—the nuts will still be hot when you separate them, and it might hurt a little. If the nuts feel too hot, wait another minute and then try again. If it’s just too painful (everyone’s threshold is different), you can let the nuts cool completely and then smash and break them up. They will tend to be clumpier, but no one ever complained about a cluster of caramelized nuts coated in chocolate.
- ASK A FRIEND! If you’re making a double or triple batch of nuts, or have sensitive fingers, rope a friend in to help you separate the hot caramelized nuts. Many hands make light (and quick) work!
Ingredients
1/2 lb (8 oz or 227 g) raw unsalted peanuts (or use roasted unsalted peanuts)
3/4 c (160 g) granulated sugar
1 1/2 c (roughly 267 g) milk chocolate chips (ex: 31% Guittard chocolate chips)
1 1/2 c (roughly 232 g) dark chocolate chips (ex: 63% Guittard chocolate chips)
1 T (8 g) kosher salt or fleur de sel (or whatever you’ve got on hand)
1 T (15 g) butter plus extra (1 T) for greasing the table or sheet trays
2 T (15 g) cocoa powder
Instructions for Caramelization
- Preheat oven to 350°F.
- Place nuts on a sheet tray and bake until lightly toasted (depends on the nut and your oven, but let’s say approximately 10 minutes for peanuts), tossing nuts halfway through for even cooking. If your nuts are already roasted, warm them up in the oven until they are hot to the touch, about 5 minutes.
- While nuts are baking, finish setting up. Place a tall stock pot or large kettle on the stove. Measure your sugar and place it near your pot. Measure out the butter and salt in a small bowl and keep it nearby. Get your potholders, a damp towel, and a long wooden spoon or spatula.
- Clear some space on a large metal or marble table, you’ll need about 3 feet by 2 feet for the nuts. Rub a little butter all over the surface to prevent the nuts from sticking. Alternatively, grease two sheet trays (cookie trays) and place them on a nearby table or countertop.
- When your nuts are lightly toasted, pull them out of the oven and carefully pour them into your pot.
- Turn the heat up to medium high, sprinkle about 3 T of sugar over the nuts, just enough for a light dusting (we’re eyeballing here—YOU GOT THIS).
- Stir nuts continuously as the sugar melts and clings to the nuts. Then add another dusting of sugar. Continue this process until all your sugar is gone and you have a nice coating of caramel on your nuts. Don’t worry if there are still some sugar granules remaining. The sugar will smoke a bit as it caramelizes and that’s great—it’ll add depth of flavor to the caramel. If the nuts begin to scorch, turn the heat down a notch or two.
- When nuts are well-coated in dark amber caramel, toss in the butter and salt, mix well, then use your potholders to carefully dump the nuts out onto your greased tabletop or sheet trays.
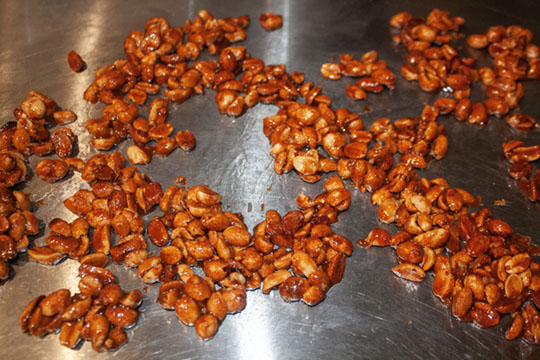
- Use your spatula or spoon to spread the hot nuts out over the greased tabletop, separating the big clumps.
- Allow the nuts to cool for about 5 minutes or until the caramel is partly hardened and cool enough for you to start breaking the nuts up with your fingers. You can use a spatula or butter knife to help you separate, but I always end up using my fingers. Sometimes the sugar will break into sharp little shards which might prick your fingers slightly but, trust me, the finished product is worth the mild discomfort.
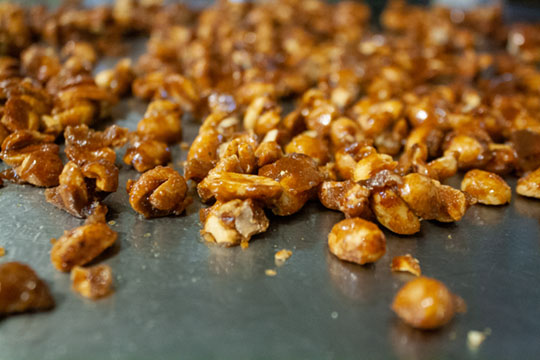
- Once all the nuts are more or less separated (a few clusters are fine), allow nuts to cool completely (another 10-15 minutes), then use your hand or a bench scraper to swipe them off the edge of the table into a large mixing bowl (hold the bowl under the edge of the table with one hand, swipe nuts into the bowl with the other). Set aside while you prepare your chocolate.
Instructions for chocolate coating
- In a double boiler, heat the water to a low simmer, then place your second pot ont to of the steaming water and throw in all of the milk chocolate and 1/2 cup of the dark chocolate. Stir until just melted (try not to leave the chocolate on too long, we don’t want it any hotter than 120°F).
- Remove chocolate from heat, dry the water off the bottom of the pot, and add 1/3 of the remaining cark chocolate to the melted chocolate, stirring all the while. When the dark chocolate is mostly melted, add the second portion of dark chocolate, stirring until it is mostly melted (a few remaining lumps are fine). Then add the remaining third of dark chocolate and stir. If the chocolate seems thick and the remaining chips aren’t melting, pop the pot back on the double boiler for about 30 seconds to reheat it.
- Dab a small amount of melted chocolate under your lower lip. It should feel room temperature. If the chocolate still feels hot to the touch, give it a couple more minutes of stirring off the heat to cool it down. (If the chocolate is too hot, it takes forever to coat the nuts and most of it will end up stuck to your bowl. We’re looking for a final temperature of about 95°F).
- Once your chocolate is ready, dry the bottom of the chocolate pot (you don’t want in your chocolate) and pour about ¼ cup of cooled chocolate over the nuts and stir to coat (just eyeball this measurement, a little more or less won’t hurt). Continue stirring and tossing occasionally until the first layer of chocolate is tacky and the nuts are beginning to clump a bit. Then add the next ¼ cup of chocolate and continue until all the chocolate is gone. If you get to a point where the chocolate on your nuts is taking too long to solidify (this can happen in a warm kitchen), pop the bowl in the fridge for a few minutes, then pull it out and stir the nuts to break up any lumps. If your melted chocolate starts to get too thick (this will almost certainly happen with supermarket chocolate), quickly stir it over the double boiler to slightly reheat it, making sure to dry off the bottom of the pot again afterwards.
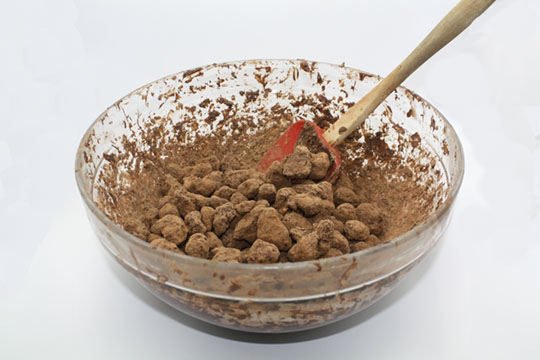
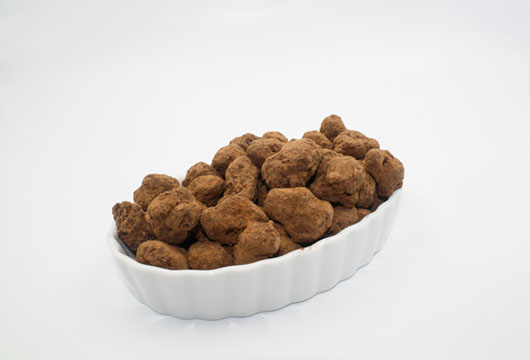
- Once you’ve used all your melted chocolate and the coating on the nuts is mostly hardened, dust with cocoa powder and toss to coat. Set aside until the nuts have fully hardened (10 minutes or so), then store them in an airtight container or package them up in bags for your friends! They’ll keep in a cool, dry place for at least a month.
TIPS
- If you want to experiment with adding dried spices like garam masala to your nuts (YUM!), I recommend adding them with the butter and salt at the end of the caramelization process. This will toast your spices quickly, allowing them to bloom into full flavor without burning.
- Get some cocoa butter! If you want to experiment more with this and other chocolate recipes, I highly recommend purchasing some cocoa butter. A little added cocoa butter makes supermarket chocolate a lot more fluid and easier to work with, particularly when it’s in the temperature range of 88°F-96°F. Adding cocoa butter to supermarket chocolate is much cheaper than buying professional couverture (which is basically chocolate with extra cocoa butter).
- Want to a thicker chocolate coating on your nuts? Go for it! I usually make these nuts in big batches and don’t have a bowl large enough to add a 1/4″ thick coating on my nuts (they bulk up as you pile on the chocolate layers), but if you’ve got a big ole’ bowl, then do it!
- Save your leftover chocolate! If you’ve got a lot of chocolate stuck to your bowl when you finish this recipe, you can pop the bowl over the double boiler for a minute or two to melt the chocolate. Scrape it onto a piece of plastic wrap or parchment paper and store it away for your next candy or baking project.
- Save water! Use the hot water from your double boiler to clean your chocolatey pot and bowl. Just swirl the hot water around in both for a few seconds and the chocolate will come right off.
Leave a Reply